Lead Pipes
Do You Have Lead Pipes in Your Home? Water mains in the UK are not…
Read more24 hr Emergency Callout

Advice
If you’re looking to build a soakaway on your property, there are probably a few questions you would like answered first. Below, Coastal Drains answer the main questions regarding soakaway construction, why soakaways are needed, as well as how to properly complete your soakaway pit construction. First things first you may be asking:
Simply put, when you dig a hole in the ground which is then filled with rubble and coarse stone; you have created a soakaway drainage field. These stones allow surface water to percolate back into the earth close to where it falls. A soakaway is only a part of a full drainage system, providing an efficient and environmentally friendly solution to deal with surface water, runoff water, rainwater, and stormwater. A soakaway also has a drainage pipe leading into the structure from the area excess water usually builds – a similar idea to a gutter from a roof or a roadside drain.
As an environmentally friendly solution to dealing with drainage, soakaways also use fewer materials than a conventional drainage system. As this kind of drainage system deals with the excess surface water in an area where it is commonly appearing, building a soakaway prevents the need for processing or adding to the already overburdened drainage and sewerage systems of your local authority. Soakaways also avoid the need for sewage treatment plants for chemical curing, as this water is less likely to become polluted before it returns to the ground.
If areas of your property are frequently becoming waterlogged due to poor drainage or bad weather, you will need to consider installing appropriate drainage to remove surface water that, if too much accumulates and is not removed, will otherwise cause water damage and dampness to your buildings.
If you have an upcoming or ongoing project involving the use of hard landscaping in your gardens, such as a driveway, large patio, or stone decking, you must make provision to ensure surface water is dealt with as part of the building project rather than being directed into the existing sewers and onto the effluent treatment systems.
A soakaway design that ensures you have a SUDS (Sustainable Urban Drainage System) compliant system in place that can remove water efficiently and in an environmentally friendly way. Water drained from the ground will need to be directed into a rainwater or storm drain system of the main drains, or into a soakaway – but never into a foul water system. Rainwater should also never be directed into a cesspit or septic tank either.
In this section, we’ll go through the steps that will help you with your soakaway construction project. In order to provide the best possible soakaway construction for your property, and to effectively deal with excess water and surface runoff, follow the guide below.
If, however, you find that DIY is not your forte; you’re more than welcome to get in touch with the drainage experts at Coastal Drains to organise a soakaway construction by qualified professionals. If you’d rather this, for a free quote, get in touch today.


Part of the design stage when planning your soakaway should be discovering the makeup of the ground on your property – namely where your proposed soakaway construction will be. The soil around this area must be granular, and with good drainage properties in order for it to not become waterlogged. If you end up building a soakaway over or in heavy clay or clay soils, you’ll actually end up with a pond due to the non-porous properties of heavy clay and clay soils.
This, as well as some other planning around your soakaway construction, will make the job much easier for you – preventing a mistake that could be time-consuming to remedy.
Checking the requirements of your Local Building Regulations before conducting any work on your proposed drainage system is essential to prevent getting yourself in trouble with the local authorities.
If you’re planning hard landscaping and need to provide SUDS to deal with surface water, as mentioned above, you should take note of the Planning Policy Statement 25 – this deals with flood risks through developments and requires surface water to be collected, treated, and potentially reused, where it falls.
You should also take note of Part H3 of the Building Regulations, as this deals with surface water and foul drainage – dealing with surface water at the source rather than directing it into existing sewer systems.
Our experts are fully acquainted with all the rules, regulations, and legalities surrounding soakaway constructions and other exterior drainage constructions – so if you would prefer not to read through the manuals, please do get in touch with our experts at Coastal Drains. We can get the job done quickly and professionally, creating a cost-effective and environmentally friendly drainage solution for you. Get in touch today.
You may find that most Local Authority Regulations state that a soakaway construction must be at least 5 minutes from any habitable building. This means that it is best to locate it on the lowest part of your garden or land, as this will mean less digging on your part. You also don’t want to run a pipe longer than is needed or change its direction unless you have to, as this will make the drainage pipe susceptible to blockages.
Finding out where the water table lies is also a crucial aspect in the soakaway construction. Digging an exploratory pit will allow you to check where the water table is, and that it is below the intended site for your soakaway – if it is too high, then the water directed to the soakaway will not have anywhere to drain out to.
The drainage pipe flowing into a soakaway construction should have a diameter of at least 75mm, the minimum pipe size for any surface water drainage. However, 100mm is the recommended size in order to make your soakaway as effective as possible.
The pipe within your soakaway construction should be laid to a fall of 1 in 40. This means that, for every 4 meters of pipework, the trench should slope down by 100mm.
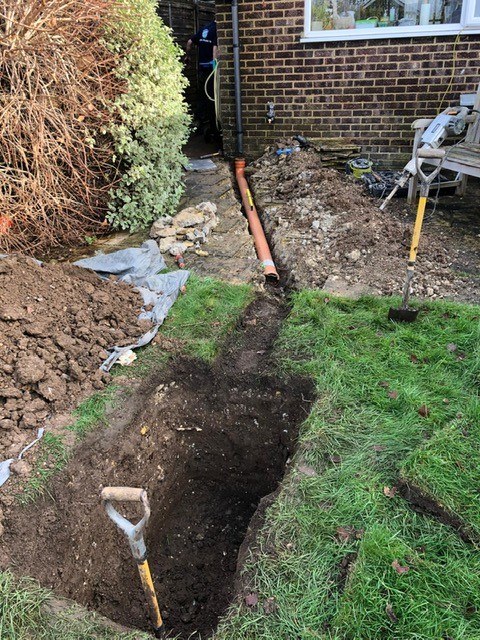
The soakaway pit and drainage trench can be dug by hand with a shovel, or you can hire a mini digger to make the work easier for you. We recommend the second option or hiring our professionals at Coastal Drains if DIY isn’t for you. If you’d rather someone else do this for you – get in touch with our team.
The soakaway construction should create a pit with the minimum measurements of 1m x 1m x 1m below the bottom of the incoming pipe. Other than that, it depends on how much water the soakaway will need to be processing and the percolation rate of the surrounding soil. To find this out, you can complete a percolation test to see how quickly water soaks into the soil surrounding the area of your soakaway construction.
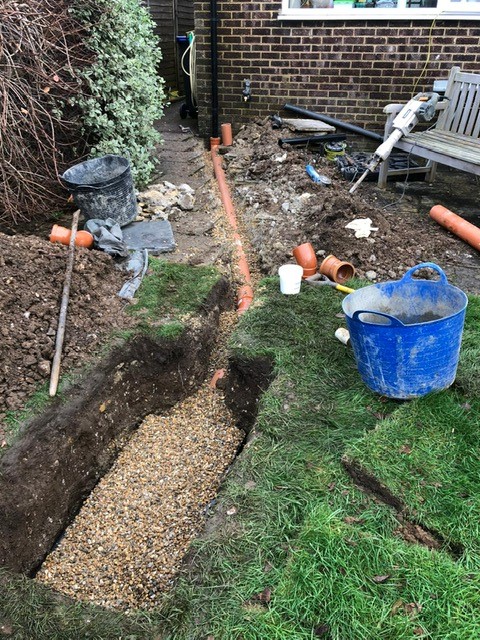
Hardcore, also known as stone infill, is the filling of the soakaway that should completely surround the pipe – finishing around 100mm above the pipe. Above the hardcore, an impervious layer, such as thick polythene, tarpaulin, or even a bed of concrete, should then be implemented. On top of this, topsoil can then be placed on top to restore the level and aesthetic of the garden.
Again, if you’re not the most adept at DIY, or you’d prefer someone else to do this job, then please don’t hesitate to get in touch with our experts at Coastal Drains. We can provide a professional and cost-effective soakaway construction as an effective drainage solution. Get in touch today.
Soakaway crates are products that, in essence, take the place of the rubble infill of a soakaway pit. They are similar in style to a milk crate, however, they have more constructive stability and come in a flat packable to be simply clipped together to form a box.
They come in two colours, green and blue, which both signify where they can be used. Green should be used in non-traffic areas as they cannot take the weight of a vehicle, and blue can be used in trafficked areas – such as under driveways as they can take the weight.
A soakaway crate is a good option if you wish to save time and effort – removing the need to transport rubble from the source to your soakaway pit. Their downfall comes with their pricing – they can be quite expensive when compared to a traditional soakaway construction, especially when you already have soakaway materials on hand.
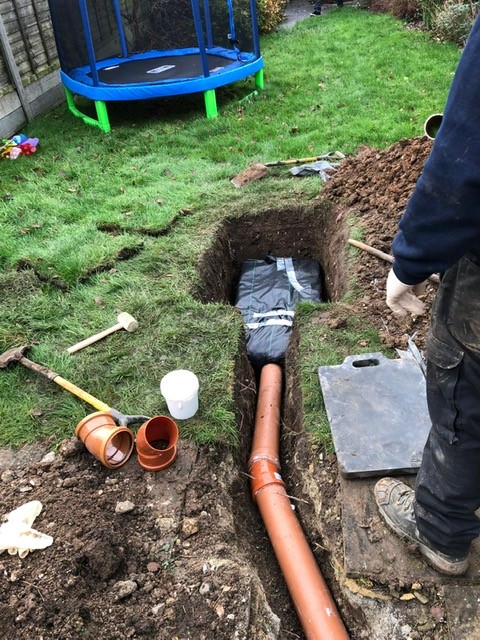
After digging a 1m x 1m x 1m hole and constructing the soakaway crate from the flat pack, you will need to line the dug hole with a tough, porous, membrane such as a geotextile membrane. A lot will need to be used, as the soakaway will need to be wrapped in this membrane. This will allow water to pass into the void of the soakaway crate but prevent any soil and sediment from entering the crate as this can cause blockages.
After lining the hole with the material, knock out the circular inlet area of the crate to allow the pipe to slide inside, and place the block into the hole. Once in the hole, place the pipe through the hole, and wrap the entire surface of the crate in the membrane. Make sure that the drainage pipe is also covered in order to prevent soil and sediment from penetrating the crate.
Finally, in-fill around the outside of the crate using soil or gravel, and then over the top with soil – or a more substantial material if using a blue crate.
If conducting your own soakaway construction doesn’t appeal to you, then feel free to get in touch with our experts at Coastal Drains today. We aim to provide cost-effective drainage solutions to all of your drainage problems – so whether you need your septic tank emptied or a soakaway construction job completed – we’re always here to provide the best possible results along the south coast.
Need a soakaway on your property to manage surface runoff? Get in touch with the professionals at Coastal Drains today.